Category Archives: graphic design/web design

graphic design and web design

How to Make a Tassel

Making Tassels for Your Bookmark

Tassels can be made from all sorts of materials: ribbon, floss, yarn, etc. You can pick these up at a fabric or craft stores or even at dollar stores.  You can also find a wide variety of online sources.

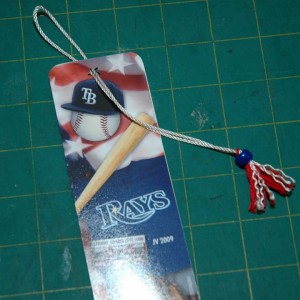
I am going to show you how I made the tassel I used on some bookmarks I made for my son’s Little League Team party.

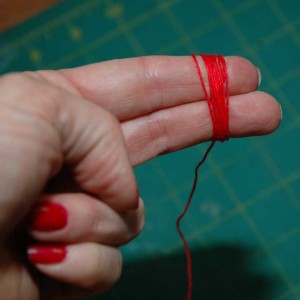
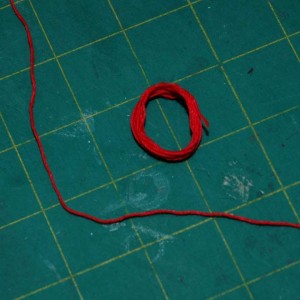
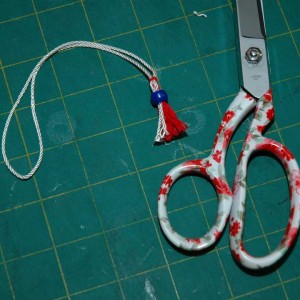
For this example I am using some embroidery and crochet materials I had around the house. The first step is to wrap the thread about a dozen times around two fingers. Trim and remove.

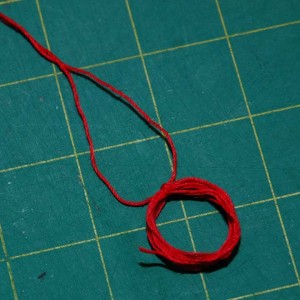
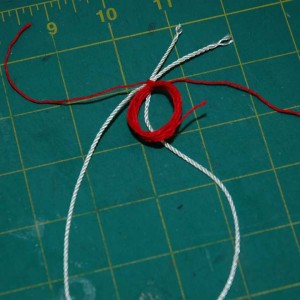
Next cut about 6 inches of thred and tie it around your looped circle.

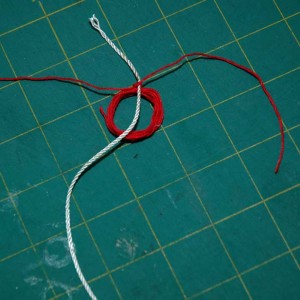
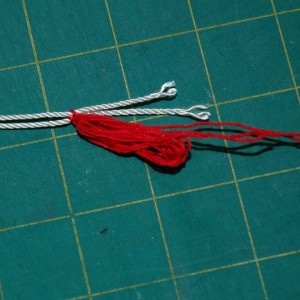
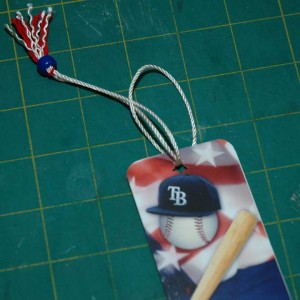
Next you will measure and cut the thread that attaches the tassel.  Measure off about 12 inches and place it as shown in the pictures below. Tie it with the ends of the thread you used to tie the tassel.

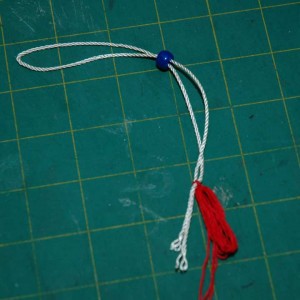
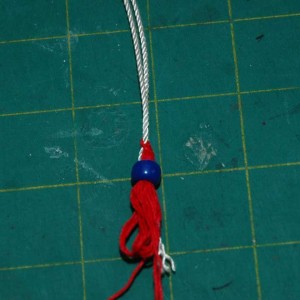
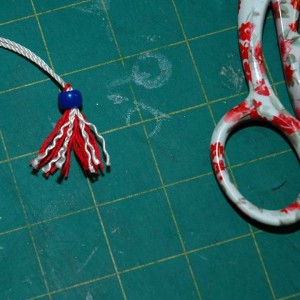
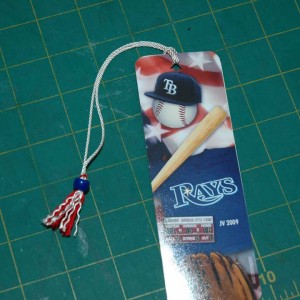
One way to finish off the tassel is to add a bead. You need one with a wide opening.  I used inexpensive plastic pony beads fore this project, but you could use fancier ones. Just slip it over the end of the loop and position over the top of the tassel. You may want to secure it with a drop of craft glue.

Next trim the end of the tassel and arrange the threads the way you like.  On this bookmark tassel, I unwinded the individual thread in my crochet yarn.

My daughter and I make many varieties of tassels, and I hope to show more soon.  Tassels can be used on bookmarks and lots of other craft projects.  Let me know if this easy tutorial helped you with your projects.

Related post:  How to Make Bookmarks From a Photo

Other craft posts:
How to Make a Prize-Winning Scarecrow

How to Make Designer Baby Burp Cloths Using Ribbon

How to Make a Yoga Mat Tote Bag

How to Make Bookmarks From a Photo

Here’s how to make deluxe bookmarks that look like they came from a upscale bookstore. Personalized bookmarks make a small extravagance perfect for a gift or party favor.

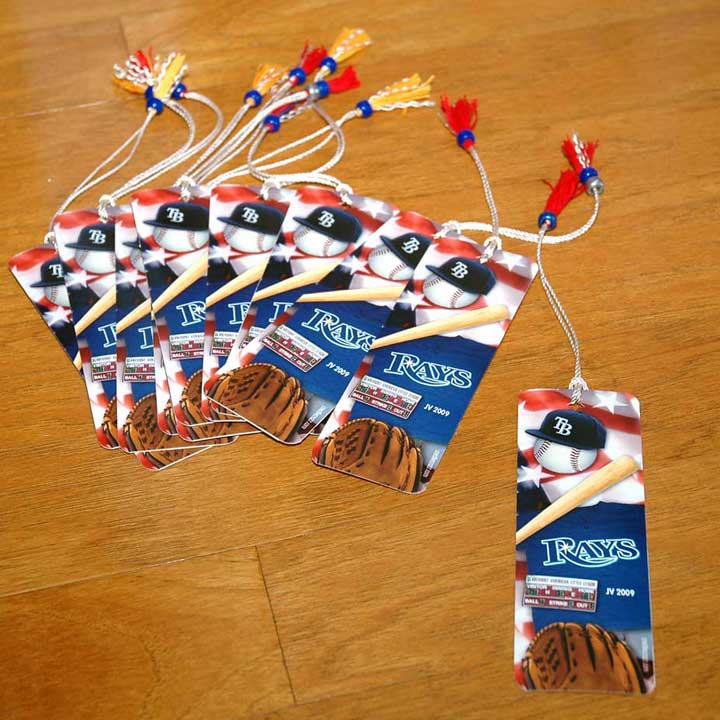
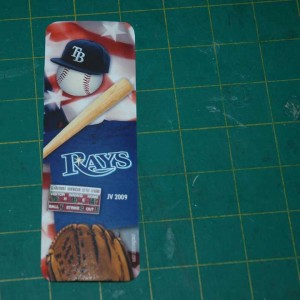
I made these baseball bookmarks to give out to the members of my son’s Little League Team at the end-of-season party.  If you bought these at a bookstore or gift shop they would run $3 to $4 a piece. They take a little time to make, but the cost breaks down to less than 50 cents each in supplies.

Step One:  Make the Art

Using photo imaging software (I use Photoshop) create your artwork to fit a 2″ x 6″ area.

These are printable bookmarks. You can print them yourself if you have a good printer. Or you can have them printed at a photo place. Remember that when you get photos printed, the edges often get trimmed a bit.  So do not include any vital art in the edge border.

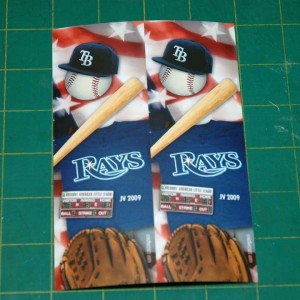
Open a new file that is 4 x 6.  Duplicate your artwork and position 2 copies inside the new file so that you print two bookmarks on one 4 x 6 photo.

Have your photo printed on lustre finish (not glossy). Lustre is more durable and does not show fingerprints.

bookmark printed two-up on standard 4 x 6 photo

Step Two: Back and Trim the Bookmark

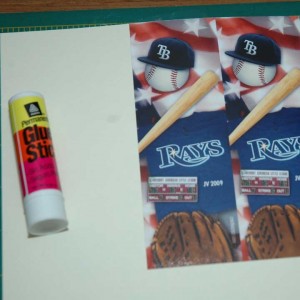
Once your photo is printed, you will want to back it with acid-free cardstock.  You can buy cardstock in 8.5″ x 11″or  scrapbook paper works as well.  Plain or a pattern will work. You can get paper at craft stores or online.

Back the bookmark with acid-free paper. USe an acid-free gluestick.
Back the bookmark with acid-free paper. Use an acid-free gluestick to glue it to the paper.

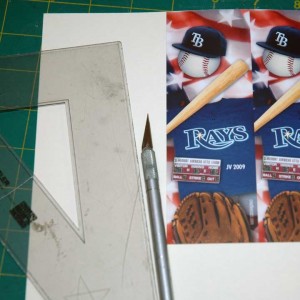
Carefully glue down the photos. If you do happen to get glue on the front of the photo, use rubbing alcohol to wipe it off. Next use an Exacto knife and straight edge to trim.

Use an Exacto knife and straight edge to trim.

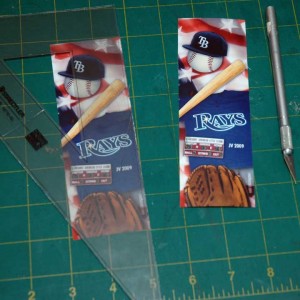
Separate the two bookmarks

Separate using Exacto.

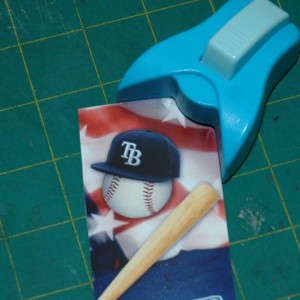
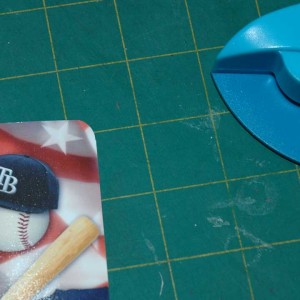
Bookmarks with rounded corners look more professional.  Luckily it is easy to make them with a handy corner punch you can pick up for a few dollars at a craft store or online.

Use a corner punch to round the corners.
Corner rounded.
Corner rounded.

Step Three: Attach a Tassel

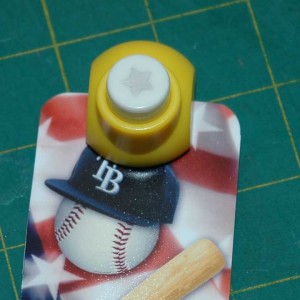
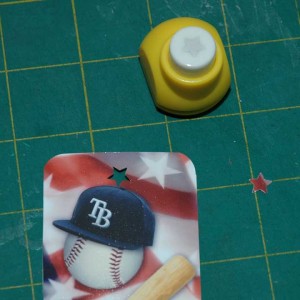
Use a hole punch to make a hole in the top. You can use a standard hole punch, or use a simple shape.  I used a star punch for this bookmark.

To attach a tassel, loop it through the hole as shown in the following photos. You can use store-bought tassels or make your own

Put loop through the hole.
Insert end of tassel through the loop.
Pull tassel tight.
Pull tassel tight.

Et voila! You now know how to make a bookmark that looks like you got it in a bookstore. My daughter and I make these and sell them at craft fairs.  We also give them as gifts.  I like to add them to a present in place of a gift card.

Now that you know an easy way to make bookmarks, get inspired by checking out some of my other bookmark designs. If you are a scrapbooker, you can probably find lots of paper, stamps, and punches to come up with interesting bookmark designs.

I’d love to hear your ideas about custom bookmark designs. I think they would make a creative party favor for a wedding, Bar Mitzvah or birthday party.

Related post: How to make a Tassel

Vintage Ad Site

Cool site with Vintage Ads on It

Ya gotta love vintage ads for cool design and insight into the history of our culture.  A web site that has a bunch of old ads all scanned in and organized by topic, date keyword, etc.  Ads are from 1930 and 1969. Tons of them!

The index is amazing.

Also a random image link.

Get inspired by these ads.  But be aware that many of them may still be under copyright, so don’t use them for commercial purposes.

Photoshop: Adding a Person to a Group Photo

Photoshop Magic Adds Missing Player Into Her Team Photo

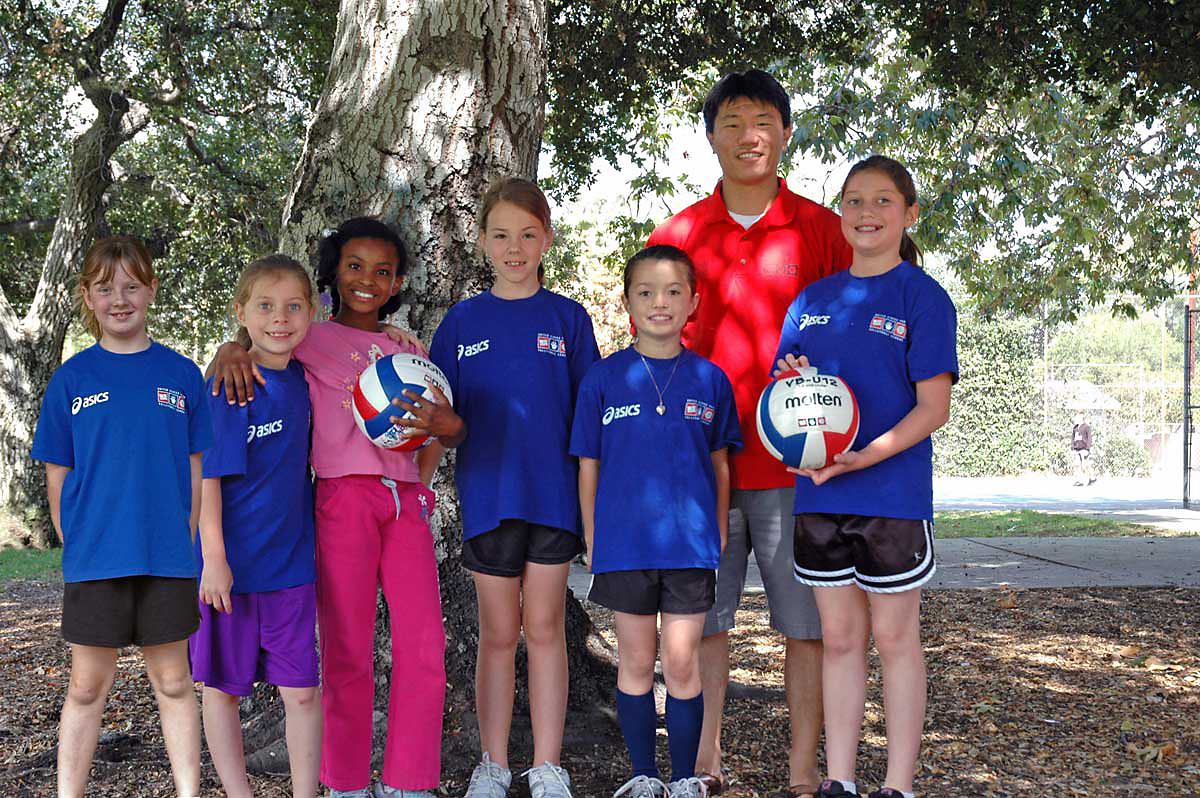
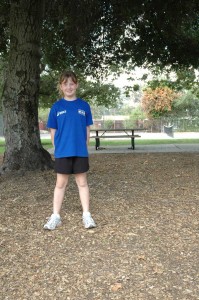
One of our players left before the award ceremony and was not in the group photo of her team. Her coach called her and she came back to pick up her medal. I took an individual photo of her and told her I would Photoshop her into the group photo.

Here is the result.

If I had not told you I added her, you would have thought she was there.  If you look closely you will see that she does not have the same shadows from the tree leaves as the other girls. Her individual shot was not in the exact right place to get the correct lighting and shadows to match.  But I think it works pretty well.

Here are the two photos I combined.

How did I do it? To make it look real, the trick is to make a accurate selection around the person you want moved. It helps to feather the selection by one or two pixels. Another tip is to try to adjust both photos so the lighting looks similar. I adjusted the group photo lighting a bit to make it appear less shadowed.

Related posts:

Cute Volleyball T-Shirts

What to do about spam on WordPress

How to avoid spam on your blog and recover a comment you accidentally marked as spam

If you are just starting out with WordPress, you will soon learn that the thrill of attracting visitors to your site may be soon followed by the agony of also attracting spammers.  About four months after I put up this site, I counted 500 instances of spam comments.  Some of it pretty creepy.  Fortunately, none of it was ever published as it got caught in a filter because I set all comments with more than 2 urls to be put up for moderation. (Spam usually has tons of urls).  But still, it was a hassle to look at each one and delete.  I tried to delete them so fast that sometimes I accidentally deleted a real comment.

The best solution I have is to use the plug-in Automattic Kismet (Akismet for short). Just go to their website and follow the instructions.

Not only does it catch most spam, but it waits a couple weeks before permanently deleting it. That way if you accidentally mark a comment as spam, you can recover it. I found some great directions on recovering comments you accidentally marked as spam at from a helpful blogger here.

Best Place to Register a Domain Name

I did a lot of research before I launched creativezazz.com:

how to pick a good domain name
the best place to register a domain name
the best web hosting

I registered my domain name though 1+1. If you do decide to go through 1+1, please go through my link Great Domain Name Specials at 1&1

I picked 1+1 because numerous people had recommended it and it had a great price. Although my host (Hostgator) also offered domain name registration, I heeded advice to register my domain name with a different company. That way if I ever want to change my host, or have a dispute with my host, it cannot hold my domain name hostage. 1+1 also has some great tools for picking a good name.

Check out different site names.

Check out names at 1+1!

Let me know if you have comments about 1+1. I found my experience signing up easy and so far I have no problems with them.

Best Web Hosting

How to Pick a Great Web Host . . . Choose Hostgator!

Before I launched creativezazz.com I did extensive research on web hosting. I ended up choosing Hostgator because they had the most good reviews (and no nightmare reviews, like several other places had), and they had a reasonable price. They also had all the features that I wanted.

This site is my first one, and I found the set up with Hostgator pretty easy. When I did have a question, they had a great forum. I have never had to call for help, but I have heard to is pretty easy to get a live person.

If you do go through Hostgator, check for coupon codes and specials, which they frequently have. Also, do not be afraid to pick one plan over another, because they will let you switch plans if you find you want a different one.

You can also register your domain name through Hostgator. I chose to register through a different company just because my research suggested this was a wise thing to do.

If you do choose Hostgator, please consider going through my link. Thanks.

Hostgator has good reviews, that’s why I chose it. It is also reasonable.

I welcome your feedback about Hostgator. So far, my experience has been good!

By the way, you can find free hosting sites. This might be a good option if you are starting a brand new website for the first time. Then once you know more what you want you can switch to Hostgator or another host. Free sites do not have all the features you will eventually want. They may not let you put up your own ads and in fact may put up their own ads. But it might be a an option just to let you get your feet wet for free. You will need to transfer all your info to the new host, however, so it might be easier in the long run just to try a low-end plan from a paid site from the start.

Make a Cool Poster in the Obama Style

My daughter's pic in Obama Style
My daughter

A fun site from pastemagazine.com allows you to quickly take a photo and turn it into art in the style of the iconic Obama poster.

Iconic campaign poster of Barack Obama

Just go to Obamicon.me and follow the easy instructions.  The trick to make the poster look good is to play with the sliders that allow you to adjust how much dark blue, light blue, red and white is in the image.  As a Photoshop guru, I think this a neat little way for just about anyone to make a posterized image without having to know all about Photoshop.  You can then download, email or put the images into Facebook.  The site has more than a half million pics in the gallery now!

Most photos look great just doing it this way. If you want, you can go into Photoshop or another program first, and cut out the background so it has less detail. I did this with my puppy.  You can also edit the pic after you download it.  Make sure to change it from index color to rgb.  I also made the white whiter on mine. Have fun.

Very cool.  (Thanks, Rex, for showing me the site!) Try it.

My husband
My husband

If you just want to buy a Obama Hope campaign poster, check out this Aamzon link.

Amazon has a few other Obama items I like. Like this hat . . . .

And this company sells a cool little pins that looks like the front page of the newspaper for historic events. Check out the one about Obama making history. Would make a nifty little gift for an Obama supporter.

I love the superhero version of Obama on this t-shirt. There are tons of items at Amazon. These were my favorites.

Design from print to web

It’s killing me that I cannot hang indents, kern, or make elegant line spacing using “space after!”

I feel like part of my hand has been paralyzed, and I just cannot do the things I need to do.  But hey, I got the site up and running. I have not completely overcome my terror of code, but I have dipped a toe into it  . . . and not died.

I have been using Quark to do print design since version 2.0 I think.  So it is second nature.  (I have used Photoshop since 2.0 as well, but that is another story). Quark was like magic to someone who had used tape to make boxes. Remember lining up the rounded corner tape with the straight tape anyone?  Ah, but the waxer and Exacto, which gave tactile satisfaction, gave way to computer keys. You lost something, but you gained speed and precise control.

That control—to place everything on the page exactly where you want it in a keystroke—has now been taken away!  I am at my computer, but I can’t tell my fonts and pictures exactly where they should go!  I feel powerless.  Like in a car where the brakes don’t work.  

Once again, you lose something, but you gain as well. Maybe I can’t kern, but on the Web I can make corrections wihtout stopping the press. I can update. I can interact with readers. And 4 color costs no more than 2.